- Set up the view you want, then choose the export button in the viewer’s toolbar.
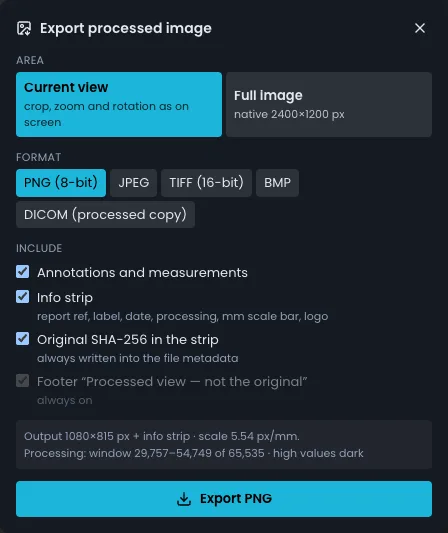
- Pick the Area: Current view (crop, zoom and rotation as on screen) or Full image (native size).
- Pick the Format: PNG, JPEG (with a quality slider), TIFF (16-bit grey of the processed values, or 8-bit colour when a colour scale is on), BMP, or DICOM: a separate DICOM copy of the full image with the original’s header details and a description of the processing.
- Choose what to include: annotations and measurements, an info strip (reference, label, date, processing, mm scale bar and logo), the original’s SHA-256 in the strip, and the footer "Processed view — not the original".
- Choose Export. On a phone or tablet you get a Tap to open link instead of a download.
- The export waits for full-resolution processing, so it matches the screen exactly.
- The processing description and the original’s SHA-256 are always written into the file’s metadata.
- The "Processed view — not the original" footer is always on for viewers and clients; owners, admins and radiographers can turn it off.
- Every export is logged in the audit trail.
- If a device’s graphics card cannot render a very large full image in one go, it says so: use Current view, or export on a desktop.
The download icon (not the export button) saves the untouched original file.